Categories
Education Explanation

IP Ratings Explained

As our devices become more advanced, they are also being used in environments that pose risks to their operation, such as exposure to dust, water, and other environmental factors. Now to address these challenges, manufacturers often provide an IP rating, which stands for Ingress Protection or International Protection. This rating gives consumers and professionals an idea of how well-protected a device is against the intrusion of solid objects and liquids. Now, what do these Ingress Protection thingys mean? Let’s find out.

What Does IP Rating Mean?

An IP rating consists of the letters “IP” followed by two digits. Each digit represents a level of protection against solid objects and liquids, respectively. The standard used to define these ratings is the International Electrotechnical Commission (IEC) 60529 standard. Here’s how to decode an IP rating:

  • First Digit (Solids Protection): This digit ranges from 0 to 6 and indicates the level of protection against solid particles like dust, sand, and dirt.
  • Second Digit (Liquids Protection): This digit ranges from 0 to 9 and indicates the level of protection against moisture and liquids, such as water.

For example, a device with an IP68 rating is protected against the ingress of dust (6) and can withstand immersion in water beyond 1 meter (8).

Breakdown of IP Ratings

First Digit: Protection Against Solids

  1. IP0X: No protection against contact and ingress of objects.
  2. IP1X: Protection against objects larger than 50mm (e.g., accidental touch by hands).
  3. IP2X: Protection against objects larger than 12.5mm (e.g., fingers).
  4. IP3X: Protection against objects larger than 2.5mm (e.g., tools, thick wires).
  5. IP4X: Protection against objects larger than 1mm (e.g., wires, screws).
  6. IP5X: Dust-protected; limited ingress of dust permitted, but not enough to interfere with equipment operation.
  7. IP6X: Dust-tight; complete protection against dust ingress.

Second Digit: Protection Against Liquids

  1. IPX0: No protection against water.
  2. IPX1: Protection against vertically dripping water (e.g., condensation).
  3. IPX2: Protection against vertically dripping water when the device is tilted up to 15°.
  4. IPX3: Protection against spraying water at an angle up to 60° from the vertical.
  5. IPX4: Protection against splashing water from any direction.
  6. IPX5: Protection against water jets from any direction.
  7. IPX6: Protection against powerful water jets from any direction.
  8. IPX7: Protection against temporary immersion in water (up to 1 meter for 30 minutes).
  9. IPX8: Protection against continuous immersion in water (beyond 1 meter, conditions specified by the manufacturer).
  10. IPX9: Protection against high-pressure, high-temperature water jets (e.g., steam cleaning).

Special Cases and Variations

Sometimes, an “X” is used in place of a digit to indicate that the product has not been tested for that protection level. For instance, IPX4 means the device is protected against splashing water, but no specific testing for dust protection was conducted.

Additionally, certain products might feature supplementary letters, such as:

  • K: Protection against high-pressure and high-temperature water jets.
  • F: Oil-resistant.
  • H: high-voltage equipment.
  • Motion during water test.

Explanation for 5 year olds

IP ratings help you know how well a device can resist dust and water. The first number after “IP” tells you about protection from solids (like dust), and the second number tells you about liquids (like water). For example, IP68 means dust can’t get in at all, and it can handle being submerged in water.

  • IP68: Dustproof and waterproof, suitable for underwater use.
  • IP55: Some dust protection and safety from water jets.
  • IPX4: No dust testing, but safe from splashing water.

This guide ensures you pick gadgets that can withstand the environment they’ll be in.

Conclusion

IP ratings act as a shield for electronic devices, protecting them from dust and water. Whether you need a phone that can withstand a rainstorm or equipment that can handle tough conditions, understanding these ratings will help you choose the perfect product for your needs. One thing your devices won’t be safe from is fire though, we’d have to wait for the third digit to get that 🙂

Stay updated on the latest in technology by subscribing to the Tino Talks Tech newsletter. Don’t forget to allow notifications for more insights into tech topics!
Categories
Education Explanation YouTube

Auto Captioning Explained

At its core, auto captioning relies on Automated Speech Recognition (ASR) technology. This is a sophisticated system that listens to spoken words and converts them into written text. But it’s not just a simple transcription process, ASR involves complex algorithms that can understand nuances in language, such as accents, dialects, and even slang. It’s like having a multilingual expert who can also decipher mumbling and overtalk.

How YouTube and Video Editing Software Harness ASR

YouTube, the video-sharing giant, has been at the forefront of using ASR for auto captioning. When a video is uploaded, YouTube’s ASR system gets to work, analyzing the audio track. It’s a challenging task(well not for the algorithm though), given the varity of content, from music videos to vlogs, each with its own audio quirks.

Video editing software also offers auto captioning features, allowing creators to add subtitles during the editing process. These tools use similiar ASR technologies, often with the added ability to customize the appearance of captions, such as font size and color, to enhance readability and viewer engagement. Some creators also use this to make lyrical videos for music.

The Software Powering Auto Captioning

The software behind auto captioning is built on machine learning and natural language processing (NLP). These technologies enable the software to learn from vast amounts of data, improving its accuracy over time. It’s a continuous learning process, much like how a human learns a new language.

YouTube’s Innovative Feature: Recognizing “Like” and “Subscribe”

YouTube recently introduced a clever feature that takes interactivity to the next level. When the words “like” and “subscribe” are spoken in a video, the system doesn’t just caption them, it also visually highlights the corresponding buttons on the screen. This smart recognition is made possible by advanced voice-to-text algorithms that are trained to pick up on these specific cues and respond accordingly.

The Future of Auto Captioning

The future looks bright for auto captioning. We can expect even more advanced features, such as real-time multilingual translations and improved accuracy in noisy environments. The goal is to make video content universally accessible, breaking down language barriers and ensuring that everyone, regardless of hearing ability, can enjoy the world’s vast array of videos and then I’ll venture into video content creation 🙂

In conclusion, auto captioning is a testament to human ingenuity and technological advancement. It’s a tool that not only makes videos more accessible but also enriches our viewing experience. As this technology continues to evolve, we’ll undoubtedly see new and innovative applications that will further change how we consume digital content.

Categories
Blogger Blogging Education how to's Tutorials Websites

Starting Your Blogging Journey: A Detailed Guide to Using Blogger

blogger-logo

As I promised that I would write detailed articles for how to create each website type I mentioned in a previous article, well here I am and let’s begin with blogs. Creating a blog can be an exciting journey into the world of online expression and communication. Whether you’re looking to share your thoughts, showcase your expertise, or build a community around a topic you’re passionate about, Blogger is a user-friendly platform that can help you achieve your goals. Here’s a step-by-step guide to creating your blog on Blogger and I’m going to take you through the whole process.

Step 1: Purchasing Your Domain Name

Before you dive into the blogosphere, you’ll need a domain name – this is the web address where people will find your blog. A great place to start is Namecheap, a reputable domain registrar known for its affordability and customer service and it’s massive discounts too. Here’s how to purchase a domain with Namecheap:

  1. Visit the Namecheap website and use the search bar to find your desired domain name.
  2. Once you’ve found an available domain, add it to your cart and proceed to checkout.
  3. Complete the purchase process by creating an account and making the payment.

Step 2: Considering File and Email Hosting

While Blogger hosts your website, you might want additional services like file and email hosting, Truehost Nigeria offers these services, providing a secure and reliable option for businesses and individuals in Nigeria. However, it’s not necessary to have separate hosting since Blogger takes care of your website hosting needs. For file storage and sharing, Google Drive is an excellent alternative that seamlessly integrates with Blogger.

Step 3: Setting Up Your Blog with Blogspot Subdomain

If you’re not ready to use a custom domain, you can start with a free Blogspot subdomain provided by Blogger. Here’s how to set it up:

  1. Sign in to Blogger with your Google account.
  2. Click on ‘New Blog’ and enter a name for your blog.
  3. Choose a blog address with the Blogspot subdomain (e.g., yourblogname.blogspot.com).
  4. Select a theme and click ‘Create Blog’.

Step 4: Adding a New Template

To give your blog a unique look and feel, you can add a new template, Templatify offers a range of premium and free Blogger templates that are SEO optimized and responsive. To install a new template from Templatify:

  1. Download a template from Templatify and unzip the file to find the .XML template file.
  2. Go to the ‘Theme’ section in your Blogger dashboard.
  3. Click on ‘Backup/Restore’ and upload the .XML file from your computer.
  4. Once uploaded, the new template will be applied to your blog.

How to Add a Custom Domain

Adding a custom domain to your Blogger blog not only enhances its professional appearance but also makes it easier for your audience to remember and access your site. Here’s how you can set up a custom domain, and activate redirection from non-www to www and HTTP to HTTPS.

Adding Your Custom Domain

  1. Purchase a Domain: If you haven’t already, purchase a domain from a registrar like Namecheap.
  2. Sign in to Blogger: Go to your Blogger dashboard.
  3. Access Settings: In the left menu, click on ‘Settings’.
  4. Update Publishing: Under ‘Publishing’, select ‘Custom domain’.
  5. Enter Domain Details: Type in your purchased domain URL and save the changes.
  6. Verify Domain: Blogger will provide you with CNAME records to add to your domain’s DNS settings. This verifies ownership and links your domain to Blogger.

Redirecting non-www to www

To ensure that visitors typing your domain without the ‘www’ prefix still reach your site, you’ll need to set up a redirect:

  1. Access DNS Settings: Log into your domain registrar’s control panel and locate the DNS settings.
  2. Modify A-Records: Add A-records for your domain pointing to the following Google IPs:
    • 216.239.32.21
    • 216.239.34.21
    • 216.239.36.21
    • 216.239.38.21
  3. Activate Redirect in Blogger: Back in Blogger’s settings, turn on the option to redirect the domain (mydomain.com to www.mydomain.com).

Activating HTTPS Redirection

For enhanced security, enabling HTTPS is crucial:

  1. Turn on HTTPS: In Blogger’s settings under ‘Basic’, find the ‘HTTPS’ section and select ‘Yes’ for ‘HTTPS Availability’.
  2. Enable HTTPS Redirect: Ensure ‘HTTPS Redirect’ is also turned on, so visitors are always directed to the secure version of your site.

By following these steps, your blog will not only have a custom domain but will also ensure that your visitors are always redirected to the correct and secure version of your site. Remember, DNS changes may take some time to propagate, so be patient after making these adjustments.

How to Link your Domain to Cloudflare

When setting up a custom domain for your blog, using Cloudflare for DNS management can provide several advantages over a typical domain registrar’s DNS service. Cloudflare is renowned for its robust set of features that go beyond basic DNS management, including email routing, a free SSL certificate, redirection rules, and additional layers of security.

Linking Your Domain to Cloudflare

To link your domain to Cloudflare, follow these steps:

  1. Create a Cloudflare Account: Sign up for an account at Cloudflare’s website.
  2. Add Your Site: Click on ‘Add Site’ and enter your domain name.
  3. Select a Plan: Choose from the available plans; even the free plan offers a wealth of features.
  4. Update DNS Records: Cloudflare will scan your DNS records and provide you with new nameservers.
  5. Change Nameservers: Go to your domain registrar’s website and replace the existing nameservers with the ones provided by Cloudflare.

Why Choose Cloudflare?

Cloudflare stands out for several reasons:

  • Email Routing: Easily manage and route your domain’s email addresses.
  • Free SSL Certificate: Secure your blog with HTTPS encryption at no extra cost.
  • Redirection Rules: Implement forwarding rules to redirect traffic as needed.
  • Enhanced Security: Benefit from Cloudflare’s built-in DDoS mitigation and DNSSEC for added protection against online threats.

By using Cloudflare’s services, you can ensure that your blog is not only more secure but also benefits from improved performance and reliability.

As I conclude this guide on creating a blog with Blogger, I’ve taken you through the essential steps to make a blog using Blogger with. Blogger’s user-friendly interface and seamless integration with Google’s tools make it an ideal platform for both novice and experienced bloggers alike. As you begin this thrilling journey, remember that your blog is a canvas for your unique voice and vision—so let it shine!

Looking forward, the blogging world is filled with even more opportunities. For those eager to delve into other platforms, keep an eye out for my upcoming guide on creating a blog using WordPress. This platform offers a comprehensive framework for those who desire greater customization and control over their online presence. Whether you’re blogging as a hobby or aiming to carve out a professional online niche, WordPress is equipped to accommodate your aspirations.

So, keep your inspiration alive, and prepare to explore the depths of the blogging world with my forthcoming WordPress tutorial. Thank you for reading, let me know what you think in the comments below, and also share this article to help others!

Categories
AI Android Apps Education eLearning iOS

Top 5 Math Solver Apps Available in Zimbabwe

Ordinary level students in Zimbabwe are writing exams next week, and many students are looking for ways to improve their math skills. One way to do this is to use a math solver app. Math solver apps can help students to understand complex math concepts and to solve difficult math problems.

Here are the top 5 math solver apps available in Zimbabwe:

Microsoft Math Solver


Microsoft Math Solver is a free app that can help students to solve a variety of math problems, including algebra, geometry, calculus, and statistics. The app also includes a step-by-step solution feature, which can help students to understand how to solve problems on their own.

Download on the App Store
Get it on Google Play

Microsoft Bing AI

Microsoft Bing AI is a new AI-powered math solver that can solve a wide range of math problems, including algebra, geometry, trigonometry, and calculus. The app can also generate step-by-step solutions, and it can provide explanations for each step.

Download on the App Store Get it on Google Play

Photomath

Photomath is a popular math solver app that can scan and solve math problems from textbooks, worksheets, and other printed materials. The app can solve a variety of math problems, including algebra, geometry, calculus, and trigonometry.

Download on the App Store Get it on Google Play

Socratic

Socratic is a free math solver app that uses a conversational interface to help students to solve math problems. The app can answer questions about math concepts and problems, and it can also provide step-by-step solutions.

Download on the App Store
Get it on Google Play

ChatGPT

ChatGPT is a new AI-powered math solver that can answer questions about math concepts and problems in a conversational way. The app can also generate step-by-step solutions, and it can provide explanations for each step.

Download on the App Store
Get it on Google Play


All of these apps are available for free download on the Google Play Store and the Apple App Store.

How to Use Math Solver Apps

Math solver apps can be used in a variety of ways to help students to improve their math skills. For example, students can use math solver apps to:

  • Check their work on homework assignments and exams.
  • Learn how to solve new math problems.
  • Review math concepts that they are struggling with.
  • Prepare for math tests.

To use a math solver app, students simply need to type or scan the math problem that they want to solve. The app will then provide a solution to the problem, along with a step-by-step explanation (if available).

Tips for Using Math Solver Apps Effectively

Here are a few tips for using math solver apps effectively:

  • Use the apps to check your work, but don’t rely on them to solve all of your math problems for you.
  • Use the apps to learn how to solve new math problems, but don’t just copy the solutions that the apps provide.
  • Use the apps to review math concepts that you are struggling with, but don’t use them as a replacement for your regular math classes.
  • Use the apps to prepare for math tests, but don’t use them to cheat on your tests.

Conclusion

Math solver apps can be a valuable tool for students who are struggling with math. However, it is important to use these apps responsibly and to not rely on them to do all of your work for you.

In addition to the tips above, here are some specific tips for ordinary level students in Zimbabwe who are writing exams next week:

  • Use the apps to review the syllabus for your math exam. This will help you to identify the topics that you need to focus on.
  • Use the apps to practice solving math problems from previous exams. This will help you to get a feel for the types of problems that you will be asked to solve on your exam.
  • Use the apps to get help with specific math concepts or problems that you are struggling with.

Remember, math solver apps can be a helpful tool, but they should not be used as a replacement for studying and practicing.

Categories
Education eLearning The Internet Zimbabwe

How to Use the Internet to Ace Your Ordinary and Advanced Level Exams

Ordinary level exams for Zimbabwean students have already begun, and many advanced level exams are just around the corner. For many students, this is a time of great stress and anxiety. However, there is one underrated tool that can help students succeed in their exams: the internet.

The internet is a vast resource of information and educational materials that can be used by students of all levels. Here are a few ways that ordinary and advanced level students in Zimbabwe can utilize the internet for their exams:

1. Access past exam papers and solutions

One of the best ways to prepare for an exam is to practice on past papers. The internet is a great place to find past exam papers for all subjects. There are also many websites and online forums where students can discuss past papers and get help with difficult questions.

2. Find online tutorials and practice questions

There are many websites and online courses that offer tutorials and practice questions for a variety of subjects. These resources can be a great way to learn new concepts and practice answering exam-style questions.

3. Connect with other students and teachers

The internet is a great way to connect with other students and teachers from all over the world. Students can use online forums and social media groups to discuss their studies, ask questions, and get help from others. Students can also find online tutors who can help them with specific subjects.

4. Find educational games and apps

There are many educational games and apps available online that can help students learn new concepts and practice for their exams. These games and apps can be a fun and engaging way to learn, and they can be especially helpful for students who learn best by doing.

Here are some specific tips for ordinary and advanced level students in Zimbabwe on how to utilize the internet for their exams:

Ordinary level students

  • Focus on finding past exam papers and solutions for your specific subjects.
  • Use online tutorials and practice questions to learn new concepts and practice answering exam-style questions.
  • Connect with other students and teachers online to discuss your studies and get help.

Advanced level students

  • In addition to the tips above, you can also use the internet to find more specialized resources for your subjects.
  • There are many online databases and journals that contain research articles and other scholarly works.
  • You can also use the internet to find online courses and tutorials on specific topics.

No matter what level you are at, it is important to use the internet responsibly and to be selective about the resources you use. Make sure to use credible sources of information and to avoid websites and online forums that are known for spreading misinformation.

The internet can be a powerful tool for students who are preparing for their exams. By using the internet wisely, students can access a wealth of information and resources that can help them succeed.

Categories
Education eLearning Review

Exploring the GitHub Student Pack: Tools Resources and Opportunities

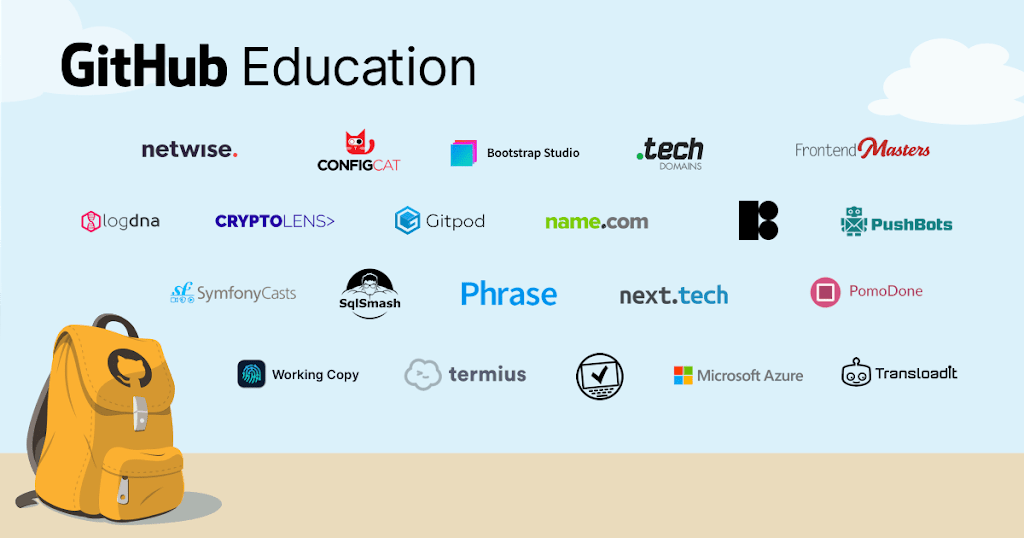
GitHub the world’s leading platform for hosting and collaborating on code has introduced an incredible initiative called the GitHub Student Pack. Aimed at empowering students this pack offers a variety of developer tools resources and benefits all free of charge.

In this article I am going to explore the numerous benefits provided as part of the GitHub Student Pack and demonstrate how it can revolutionize student learning collaboration and career advancement.

Benefits of the GitHub Student Pack

1. Free GitHub Developer Account:

Every student who is enrolled in a degree-granting institution becomes eligible for a free GitHub developer account allowing them to create repositories collaborate with others and showcase their projects to potential employers.

2. Free Access to Developer Tools:

The GitHub Student Pack provides access to a multitude of developer tools and services. Students can obtain licenses for professional software such as JetBrains IDEs, Atom and PyCharm enabling them to enhance their coding experience.

3. Cloud Hosting Services:

The pack offers up to $110 in credit for services like AWS, Azure and DigitalOcean. This allows students to deploy their projects to the cloud practice building scalable applications and gain valuable experience working with industry-standard hosting providers.

4. Learning Resources:

Various online learning platforms such as DataCamp, Frontend Masters and Unity Learn Premium are included in the pack. Students can leverage these resources to enhance their coding skills learn new programming languages and explore emerging technologies.

5. Design Tools:

Students can access design tools like Canva, Framer and Proto.io to create stunning visuals for their projects. This opens up opportunities for students to develop their design skills and create polished user interfaces.

6. Free Domain Name:

The GitHub Student Developer Pack also provides a free domain name from a variety of providers. This allows students to have a professional online presence for their personal portfolio or project website.

7. GitHub Education Community:

Students gain entry into the GitHub Education Community where they can connect with like-minded individuals participate in discussions collaborate on projects and learn from experienced developers. This community serves as a valuable platform to network seek guidance and showcase their work.

8. Exclusive Discounts:

In addition to the free resources the GitHub Student Pack offers exclusive discounts and perks from various services and software providers. This includes services like GitKraken, Namecheap and Standard Library among others. These discounts enable students to explore premium tools and services at a more affordable price.

Conclusion:

The GitHub Student Pack is an invaluable resource for students looking to enhance their coding skills collaborate on projects and prepare for their future careers in the tech industry. By providing free access to developer tools learning resources and exclusive discounts GitHub is empowering students worldwide to unlock their full potential. Whether you are just starting or deepening your coding journey the GitHub Student Pack offers an extensive collection of resources and benefits that can significantly accelerate your growth and provide you with a competitive edge.

Categories
Education eLearning WhatsApp

Can EduZone be the one that fills in the gap left by other ELearning softwares?

Source: EduZone

Since the beginning of the COVID-19 era in 2019 eLearning has boosted it’s outreach worldwide promoting more learning opportunities for students. Many softwares have sort of ‘replaced’ our traditional ways of learning and with the introduction of ChatGPT this has gotten better. Yes, it’s good for learners as it provides a wide range of information but this learning method doesn’t cover all the necessities particularly in our country. Those online learning platforms, bots and ChatGPT handles only provide the learning material which is good. But particularly for Zimbabwe, there are no past exam papers available on the internet. If you’ve looked for them you’ll understand where I’m coming from. This is where EduZone chips in. Eduzone is a WhatsApp bot specially made for online education for both primary and secondary education and it is 100% free, that too being available for all stages within the grade 1 – form 6 levels.

EduZone offers notes, question papers and marking schemes for Grade 7, O Level and A level students which are part of all these stages’ syllabuses. The bot also has a smart interaction system as users have to make their entries using links to their categories. This is where EduZone beats all the other eLearning platforms in Zimbabwe. As stated above, it has past exam papers and also their marking schemes and that’s basically every exam class student wants. And as we all know nothing is good completely, EduZone has got one flaw. The bot doesn’t have learning material for some levels. In my trial I discovered that there is no learning material for grades below grade 7 and also no learning material for O Level Computer Science and Biology.

Bot link

Conclusion

EduZone is a really useful tool particularly for the exam classes. All they need to do is to add content to the subjects that have no learning materials.

Categories
Education Programming

List of websites that teach you coding for free

To help you choose where to learn to code, we’ve compiled a list of the top 27 free online coding courses and resources in this guide. 

 1. BitDegree 

 2. Codecademy 
 3. Coursera 
 4. edX 
 6. Code.org 
 7. Codewars 
 8. Udemy 
 10. freeCodeCamp 
 14. W3Schools 
 15. Hackr.io 
 16. Bento 
 18. Sololearn 
 20. Upskill 
 21. Pluralsight 
 22. Codeasy 
 23. aGupieWare 
 24. Edabit 
 25. Envato Tuts+ 
 26. MDN Web Docs 
 
BitDegree is a great place to learn to code for free. This online learning platform has courses on various programming languages, including HTML, CSS, JavaScript, PHP, jQuery, and Ruby on Rails. Moreover, there are coding classes for subjects like game development and data science. Some even come with certifications, which can be helpful when looking for a new job. To get started, simply sign up with an email address and password, and pick one of the available free courses.