
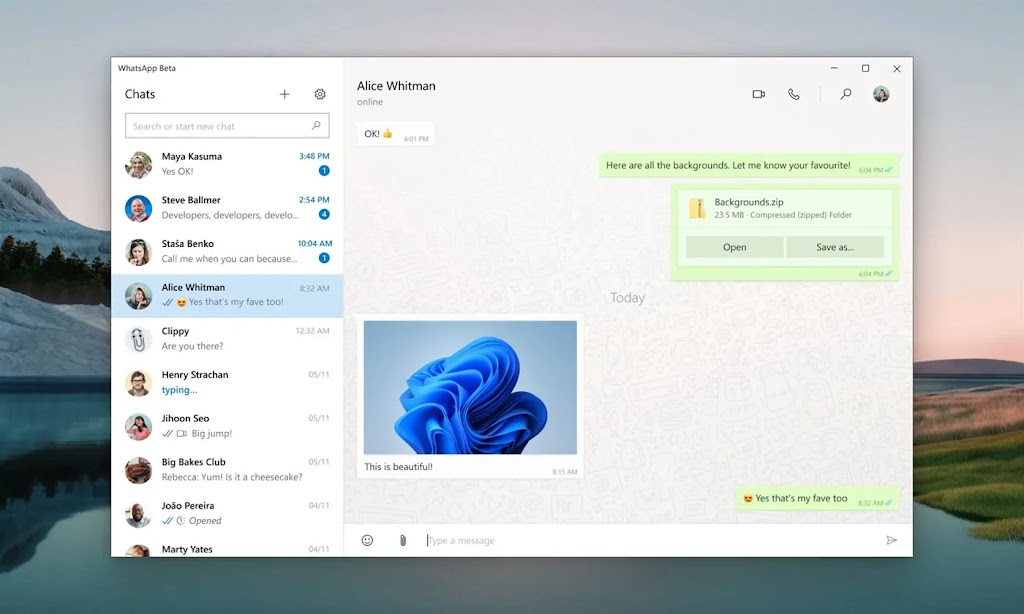
WhatsApp has become one of the most popular communication platforms connecting people worldwide with its user-friendly interface and end-to-end encryption. To cater to various user preferences and needs WhatsApp offers two options for accessing the platform on a computer – WhatsApp Web and WhatsApp for Desktop. In this article we will delve into the differences between these two options highlighting their unique features and functionalities.
WhatsApp Web: To use WhatsApp Web users need to open the web browser on their computer navigate to web.whatsapp.com and sync it with their mobile device by scanning a QR code from the WhatsApp mobile app. It supports all major browsers like Google Chrome Mozilla Firefox Microsoft Edge and Safari.
WhatsApp for Desktop: In contrast WhatsApp for Desktop requires downloading a dedicated application from the official website. It is compatible with Windows 8 and higher macOS 10.10 and higher and select versions of Linux.
WhatsApp Web: The user interface of WhatsApp Web emphasizes simplicity and consistency with the mobile app interface. It allows users to send and receive messages make voice and video calls share files and manage contacts with ease. Features like emojis stickers and the ability to change chat wallpapers are all present.
WhatsApp for Desktop: Similarly WhatsApp for Desktop offers a familiar interface but is optimized for desktop screens and provides a more expansive view. With a larger display users can enjoy a more immersive chatting experience. The desktop app also supports keyboard shortcuts for efficient navigation.
WhatsApp Web: As the name suggests WhatsApp Web relies on an active internet connection on both the computer and the mobile device. It mirrors all the conversations and media files from the mobile app while enabling users to manage their chats conveniently on a larger screen.
WhatsApp for Desktop: In comparison WhatsApp for Desktop operates independently with its own internet connectivity. Once installed users can access their chats and media files without needing their mobile devices to be connected. This allows for greater flexibility and convenience especially for those who work on computers for extended periods.
WhatsApp Web: WhatsApp Web mirrors notifications from the mobile app providing real-time updates on incoming messages calls and other activities. However these notifications are limited to the browser window and there may be limitations when using multiple browser tabs or if the browser is closed.
WhatsApp for Desktop: WhatsApp for Desktop offers comprehensive system notifications independent of the browser. Users receive notifications even if the app is minimized or running in the background. It seamlessly integrates with the operating system making it easier to switch between different chat windows.
WhatsApp Web: While WhatsApp Web covers most essential features it does not support features like video calls disappearing messages and contact blocking which are exclusive to the mobile app.
WhatsApp for Desktop: The desktop version bridges this gap by providing access to advanced features such as video calls and disappearing messages bringing it closer to feature parity with the mobile app. Users can also manage privacy settings block or unblock contacts and customize additional settings directly from the desktop app.
Both WhatsApp Web and WhatsApp for Desktop serve as convenient alternatives for accessing WhatsApp on a computer. While WhatsApp Web offers a simple and accessible experience WhatsApp for Desktop provides a more comprehensive and feature-rich user experience. The choice between the two depends on individual preferences and needs. Whether users prioritize portability or desktop-focused functionality WhatsApp continues to offer versatile options to ensure seamless communication across devices.
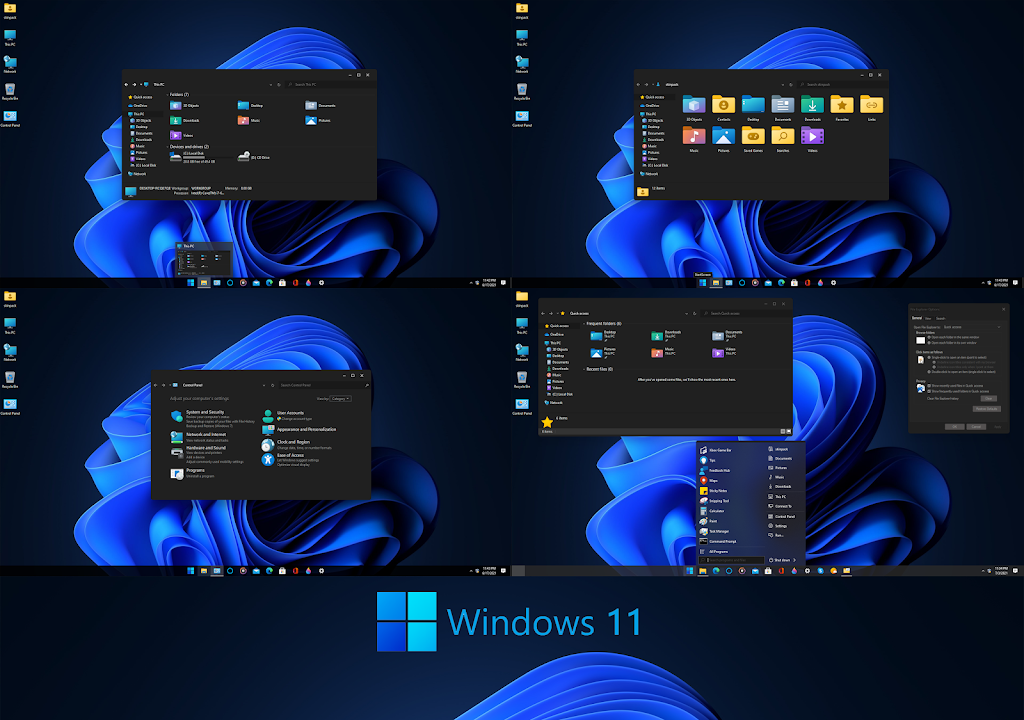
Windows operating systems have long offered users the ability to customize their desktop experience. While changing desktop backgrounds and themes is relatively well-known many people may be unfamiliar with the process of changing the icon pack. This article will guide you through the steps of using Ultra UX Theme Patcher to modify your desktop icon pack on Windows.
To start go to the official Ultra UX Theme Patcher website and download the latest version of the program. Be sure to choose the correct version for your Windows operating system (32-bit or 64-bit). Once downloaded run the installer and follow the on-screen instructions to complete the installation process. It is important to note that modifying system files can have risks so proceed with caution and create a system restore point as a precaution.
After successfully installing Ultra UX Theme Patcher you will need to find an icon pack that suits your preferences. Several websites offer a wide range of icon packs to choose from such as DeviantArt, IconArchive and WinCustomize. Browse through these websites and download an icon pack of your liking. Make sure the icon pack you choose is compatible with your version of Windows.
Once you have downloaded an icon pack navigate to the location where the file is saved and extract its contents using a file extracting tool like WinRAR or 7-Zip. Right-click on the file and select “Extract Here” to unpack the contents into a folder.
Locate the folder where the icon pack was extracted and check if there is an .ICO or .DLL file present. Right-click on the Ultra UX Theme Patcher shortcut on your desktop and select “Run as administrator” to launch the program. A new window will open displaying the status of system files in your Windows installation.
Click on the “Files Patched” tab and enable the checkbox for the option “Set Windows Live mail to the default”. Then click on the “Extra” tab and enable the option “Use a custom 3rd party theme”. Ensure that the checkboxes for “Theme Signature Bypass” and “UxStyle Core” are also enabled. Click on the “Patch” button and wait for the process to complete.
After patching is complete navigate to the folder where the icon pack was extracted. Copy the .ICO or .DLL files from the icon pack folder and go to the following directory on your Windows installation drive (usually C:WindowsSystem32).
Inside the System32 folder locate the “imageres.dll” file and make a backup copy of it. Replace the original “imageres.dll” file with the one you copied from the icon pack folder. It is essential to have administrative privileges to overwrite system files.
Once you have replaced the “imageres.dll” file save all your work and restart your computer. After the restart you should see the new icon pack applied to your desktop file explorer and system icons.
Changing the desktop icon pack can be a fun and satisfying way to personalize your Windows desktop. By using Ultra UX Theme Patcher you can easily modify your desktop’s appearance with custom icon packs. Remember to exercise caution during the process and be sure to back up any essential files before making any changes. Enjoy exploring the vast array of icon packs available and transforming the look and feel of your Windows desktop.

In today’s fast-paced digital world efficiency is key. Time is often limited and therefore finding ways to complete tasks more quickly and efficiently becomes paramount. This is where keyboard shortcuts come into play. Windows shortcuts are simple combinations of keyboard keys that can perform a variety of functions commands and operations on your computer. These shortcuts can significantly improve your productivity saving you time and effort. Whether you’re a casual user or a professional mastering windows shortcuts is a worthwhile endeavor. In this article I’m going to list a 100 windows keyboard shortcuts for you.
Note : The keyboard shortcuts mentioned below are based on standard US keyboard layout . Different keyboard layouts may require modifications in the key combinations .
1. Ctrl + C: Copy
2. Ctrl + X: Cut
3. Ctrl + V: Paste
4. Ctrl + Z: Undo
5. Ctrl + Y: Redo
6. Ctrl + A: Select all
7. Ctrl + S: Save
8. Ctrl + N: New
9. Ctrl + O: Open
10. Ctrl + P: Print
11. Ctrl + F: Find
12. Ctrl + H: Replace
13. Ctrl + E: Select the search box
14. Ctrl + W: Close the current window/tab
15. Ctrl + Shift + N: Create a new folder
16. Ctrl + Shift + Esc: Open Task Manager
17. Ctrl + Shift + T: Restore the most recently closed tab in your browser
18. Ctrl + Shift + C: Copy path of a file/folder
19. Ctrl + Shift + V: Paste text without formatting
20. Ctrl + Shift + S: Save as
21. Ctrl + Shift + P: Open a new private window in your browser
22. Ctrl + Shift + Left Arrow/Right Arrow: Select text word by word
23. Ctrl + Shift + Up Arrow/Down Arrow: Select text paragraph by paragraph
24. Ctrl + Shift + Tab: Switch between open applications in reverse order
25. Alt + Tab: Switch between open applications
26. Alt + F4: Close the current application/window
27. Alt + Space: Open the window menu
28. Alt + Enter: Open properties of selected file/folder
29. Alt + Print Screen: Take a screenshot of the active window
30. F1: Open Help and Support
31. F2: Rename selected file/folder
32. F3: Open search
33. F5: Refresh
34. F11: Toggle full-screen mode
35. Win + E: Open File Explorer
36. Win + D: Show desktop
37. Win + L: Lock your computer
38. Win + R: Open the Run dialog
39. Win + P: Open the projection settings
40. Win + U: Open the Ease of Access Center
41. Win + X: Open the power user menu
42. Win + I: Open Settings
43. Win + A: Open the Action Center
44. Win + S: Open Cortana/Search
45. Win + M: Minimize all windows
46. Win + Shift + M: Restore all minimized windows
47. Win + Arrow Keys: Snap windows to the left/right/top/bottom of the screen
48. Win + Plus (+)/Minus (-): Zoom in/out
49. Ctrl + Shift + F: Search for computers (on a network)
50. Ctrl + Shift + Left Arrow/Right Arrow: Select text character by character
51. Ctrl + Shift + Space: Select an entire row/column in Excel
52. Ctrl + Alt + Del: Open the security options screen
53. Ctrl + Alt + Tab: Switch between open applications (Task Switcher)
54. Ctrl + Alt + Shift + S: Open the Windows Ink Workspace
55. Ctrl + Alt + Esc: Switch between open applications (Task order)
56. Ctrl + Alt + Enter: Open Command Prompt in full-screen mode
57. Ctrl + Alt + Delete: Open the Task Manager
58. Ctrl + Alt + F4: Close the current virtual desktop
59. Ctrl + Alt + Left Arrow/Right Arrow: Switch between virtual desktops
60. Ctrl + Alt + D: Show/hide the desktop icons
61. Ctrl + Alt + Numpad Plus (+)/Minus (-): Zoom in/out (Magnifier)
62. Ctrl + Alt + Space: Preview the desktop in full-screen mode
63. Ctrl + Alt + R: Record the screen with the Game Bar
64. Ctrl + Alt + G: Start/stop recording the screen with the Game Bar
65. Ctrl + Alt + I: Show/hide the color inversion (Ease of Access)
66. Ctrl + Alt + O: Show/hide the color filters (Ease of Access)
67. Ctrl + Alt + P: Show/hide the high contrast mode (Ease of Access)
68. Ctrl + Alt + S: Start/stop the screen reader narrator
69. Ctrl + Alt + T: Show/hide the on-screen keyboard (Ease of Access)
70. Ctrl + Alt + U: Show/hide the text cursor indicator (Ease of Access)
71. Ctrl + Alt + X: Start/stop the mouse keys (Ease of Access)
72. Ctrl + Alt + Y: Start/stop the speech recognition
73. Ctrl + Alt + N: Create a new folder (Windows Explorer)
74. Ctrl + Alt + W: Show window menu (Windows Explorer)
75. Ctrl + Alt + Left Arrow/Right Arrow: Go back/forward in File Explorer
76. Shift + Delete: Permanently delete a file/folder without sending to recycle bin
77. Shift + F10: Open the context menu for the selected item
78. Shift + F3: Change the case of selected text (uppercase/lowercase)
79. Shift + F10 + Arrow Keys: Move files/folders within File Explorer (using context menu)
80. Shift + F12: Save document (in Microsoft Office applications)
81. Shift + Tab: Move backward through tabs/buttons/fields on a webpage or form
82. Shift + Click: Open a file/folder in a new window
83. Shift + Win + Left Arrow/Right Arrow: Move a window to the left/right monitor
84. Alt + F: Open the File menu in the current application
85. Alt + E: Open the Edit menu in the current application
86. Alt + V: Open the View menu in the current application
87. Alt + T: Open the Tools menu in the current application
88. Alt + B: Open the Bookmarks menu in the browser
89. Alt + P: Open the Page menu in the browser
90. Alt + G: Open the History menu in the browser
91. Alt + H: Open the Help menu in the browser
92. Alt + C: Open the Developer menu in the browser
93. Alt + R: Open the References menu in the browser
94. Alt + W: Open the Window menu in the browser
95. Alt + Q: Quit the application
96. Alt + 1/2/3/…/9: Access the corresponding tab in a browser or application toolbar
97. Alt + F10: Activate the menu bar in the current application
98. Alt + F5: Restore the size of the current window
99. Alt + Home: Open the homepage in the browser
100. Alt + Enter: Open the Properties dialog box for the selected item
These are just a few of the many keyboard shortcuts available in the Windows operating system.

As social media platforms continue to dominate our digital landscape they have also become breeding grounds for malicious activities. These deceptive practices can have serious consequences for unsuspecting users who unwittingly fall victim to them.
Link masking involves disguising the true destination of a hyperlink by altering its appearance. This technique is commonly employed by scammers and spammers to deceive users into clicking on malicious links. The disguised links often resemble familiar or trustworthy websites making it extremely challenging for users to discern their true nature. Here are some examples and I’m sure you’ll notice the difference between the one marked in green and one marked in red.
Spamming refers to the act of sending unsolicited and unwanted messages in bulk. These messages often contain misleading or fraudulent content aimed at tricking users into taking specific actions. Social media platforms including Facebook, Instagram and WhatsApp are frequently targeted by spammers who seek to exploit the broad user base and easy accessibility of these platforms.
Scamming is a broader term that encompasses various fraudulent activities designed to deceive and defraud users. Scammers typically employ techniques such as phishing identity theft or false advertising to manipulate unsuspecting individuals. Social media provides scammers with a vast audience to exploit as well as impersonation opportunities making it an attractive avenue for their illicit activities.
Be cautious when clicking on links especially those sent by unknown sources or through suspicious means. Hover over the link to check its true destination before clicking (if you’re on desktop). If the link looks suspicious or too good to be true avoid clicking on it altogether.
Before engaging with any content or offers on social media verify the authenticity of the source. Look for official account badges, verified profiles and the presence of contact information. Be skeptical of accounts with limited followers a lack of activity or inconsistent information.
Avoid interacting with unsolicited messages from unknown individuals or sources. Delete any suspicious messages immediately and block the sender to prevent further contact.
Install reputable antivirus software on your devices as it can detect and block malicious links spam messages and potential scams. Keep the software up to date to ensure maximum protection.
If you come across any potential scams or spamming attempts on social media report them to the platform’s moderation team. Reporting such activities helps protect other users and makes platforms more proactive in tackling these issues.
Stay up to date with the latest online scams and spamming tactics. Familiarize yourself with common warning signs such as poor grammar misspellings requests for personal information or claims that seem too good to be true. Being aware of these red flags can significantly reduce your vulnerability.
As social media continues to reshape the way we connect and engage online it is essential to remain vigilant against the threat of link masking spamming and scamming. By exercising caution verifying sources and staying informed about emerging threats you can protect yourself from falling victim to online scams. Remember a skeptical and discerning approach is crucial in navigating the digital landscape safely.

In today’s digital era music is easily accessible and can be enjoyed in various ways. Thanks to the advancements in technology downloading music has become even simpler and more convenient. Gone are the days of purchasing physical CDs or vinyl records(it’s a bit inappropriate to mention them though). Now you can easily download and listen to your favorite songs with just a few clicks. In this article I will talk about various ways to download music and provide step-by-step instructions to help you get started.
One of the most popular ways to download music is through streaming platforms. Platforms like Spotify, Apple Music and Amazon Music offer extensive catalogs of songs that you can stream online. However they also provide the option to download songs and albums for offline listening allowing you to enjoy your favorite tracks even without an internet connection. To download music from these platforms follow these steps:
Another way to download music is through digital music stores such as iTunes, Amazon Music Store or Google Play Music. These platforms offer a vast collection of songs and albums that you can purchase and download. To download music from digital music stores follow these steps:
This method is probably the most popular method to download music in Zimbabwe. There are several websites that allow you to download music for free legally. However it’s crucial to ensure that you download music from legitimate sources to respect copyright laws. Here are steps to download music from free music download websites:
YouTube is home to millions of music videos covers and remixes. While officially downloading music from YouTube is not supported due to copyright restrictions there are third-party applications and websites known as YouTube downloaders that allow you to save your favorite tracks. Here’s how to use a YouTube downloader:
Remember to use these methods responsibly and respect copyright laws by downloading music legally and supporting your favorite artists whenever possible. Enjoy your favorite tunes wherever you go.

In today’s fast-paced world, we are constantly surrounded by audio. Whether we’re listening to music, watching videos, or even making phone calls, the quality of sound plays a crucial role in our overall experience. Fortunately, advancements in technology have made it possible to optimize and personalize audio settings to suit individual preferences. One such innovative solution is the soundID app for Android. In this blog post, I’m going to look at how soundID can revolutionize your audio experience on your Android device.
What is soundID?
soundID is a cutting-edge audio app developed by Sonarworks, a leading company in sound calibration and optimization. The app utilizes advanced algorithms and personalized sound profiles to deliver a tailored audio experience for each user. By analyzing your unique hearing abilities, soundID optimizes the sound output of your Android device to match your specific hearing preferences, resulting in a more immersive and enjoyable audio experience.
One of the standout features of soundID is its ability to create personalized sound profiles for individual users. The app starts by conducting a hearing test, where it plays a series of tones at various frequencies and intensities. Based on your responses, soundID creates a customized sound profile that compensates for your hearing deficiencies and enhances the audio output accordingly.
With soundID, you can expect an immersive soundstage that brings your audio to life. The app optimizes the sound output across different frequencies, ensuring a balanced audio representation. Whether you’re listening to your favorite music, watching movies, or playing games, soundID enhances the clarity, depth, and richness of the audio, allowing you to hear every nuance and detail with precision.
The soundID app is designed specifically for Android devices and is compatible with a wide range of headphones and earbuds. Once installed, the app integrates seamlessly with your device’s audio settings, making it incredibly easy to use. Whether you’re using popular streaming services, local media players, or even making phone calls, soundID automatically applies your personalized sound profile, ensuring consistent audio optimization across all applications.
soundID doesn’t stop at creating a one-time sound profile. The app constantly learns and adapts to your evolving hearing needs. Over time, it refines your sound profile based on your feedback and usage patterns, ensuring that the audio output remains optimized and aligned with your preferences. This commitment to continuous improvement sets soundID apart from other audio enhancement apps on the market.
The soundID app for Android offers a remarkable audio enhancement solution that takes your listening experience to new heights. With its personalized sound profiles, immersive soundstage, compatibility, and ease of use, soundID allows you to enjoy audio content the way it was intended to be heard. I myself have already tested the app on my phone and I made two profiles, one for my Beats headphones and the other for my Apple AirPods and the app’s working fantastically. Download the app today and embark on a journey of sonic excellence.

Soccer also known as football is the most popular sport worldwide. Whether you’re a die-hard fan or enjoy playing games on your Android device there’s no shortage of fantastic soccer games available. From immersive gameplay to stunning graphics these games bring the excitement of the beautiful game right to your fingertips. So are you ready to lace up your boots and hit the virtual pitch? Let’s dive into the top 5 soccer games for Android!
FIFA Soccer is without a doubt one of the most iconic soccer game franchises. This mobile version offers an immersive soccer experience with realistic graphics and smooth gameplay. With an extensive roster of real players teams and stadiums you can lead your favorite club to victory in various game modes including Career Mode UEFA Champions League and Head-to-Head matches with friends online. The game constantly updates with new events advancements and fresh content keeping you engaged throughout the season.
Pro Evolution Soccer (PES) is another popular soccer game series loved by millions of fans globally. In PES Mobile you can create your dream team with real players from around the world. The game boasts remarkable visuals realistic player animations and a diverse range of tactical options making it a joy to play. PES Mobile also features online multiplayer matches challenging tournaments and a highly praised Master League mode where you can manage your team to greatness.
Score! Hero offers a unique and addictive soccer gaming experience. In this game you play as a rising star following an engrossing storyline through different levels. You control the movement and actions of the protagonist during key moments including scoring goals providing assists and making crucial decisions. With over 800 levels each with its own challenges and game scenarios Score! Hero keeps you hooked as you progress through the ranks and strive for glory.
Dream League Soccer puts you in charge of a budding soccer team allowing you to build and manage your club from scratch. You can customize your team’s logo kits and stadium sign top players and compete in various leagues and tournaments to conquer the soccer world. The game offers realistic gameplay mechanics smooth controls and stunning visuals. With its immersive career mode and online multiplayer option Dream League Soccer guarantees endless hours of soccer fun on your Android device.
If you’re looking for a fast-paced arcade-style soccer game look no further than Head Ball 2. In this wacky and thrilling multiplayer game you compete against players worldwide in one-on-one duels. The twist? You control a cartoonish character who hits the ball with their head! With unique power-ups challenging arenas and character customization options Head Ball 2 offers a refreshing and entertaining take on the traditional soccer game genre.
Soccer games for Android provide an incredible opportunity to immerse yourself in the world’s most beloved sport whenever and wherever you want. From the realism of FIFA Soccer and PES Mobile to the addictive gameplay of Score! Hero and Dream League Soccer and the fun-filled chaos of Head Ball 2 you’ll find a soccer game tailored to your taste. So lace up your virtual boots grab your Android device and get ready to take on the opposition in the top 5 soccer games for Android. The ball’s at your feet – enjoy the game!
Chrome flags are experimental features in the Chrome browser that allow users to customize and enhance their browsing experience. With a plethora of flags available Android users can unlock exciting features and improve their productivity. In this article I will explore some useful Chrome flags for Android and guide you on how to enable them.
The process is simple. To enable a Chrome flag, all you need to do is to go to chrome://flags then search the name of the flag and change from default to enabled.
By enabling this flag you can capture screenshots while browsing in incognito mode. It’s a handy feature for quickly saving or sharing important information from private browsing sessions. To enable it, go to chrome://flags and search ‘Incognito screenshot’
With this flag enabled Chrome will request a device authentication (fingerprint PIN or biometric) every time you open an incognito tab. This adds an extra layer of privacy and prevents unauthorized access to your incognito browsing data. To enable it, go to chrome://flags and search for ‘Device reauth’
Enabling this flag enhances the security of autofilling passwords. It ensures that biometric authentication is required for Chrome to fill in saved passwords providing an additional layer of protection against unauthorized access. To enable it, go to chrome://flags and search ‘biometric’
By enabling this flag you gain access to a personalized feed of articles and content based on your interests. It offers a convenient way to discover new information and stay updated on topics that matter to you. To enable it, go to chrome://flags and search for ‘web feed’
Enabling this flag enables Chrome to split large file downloads into smaller chunks allowing for faster and more efficient downloads. It’s particularly beneficial for those who frequently download large files on their Android devices. To enable it, go to chrome://flags and search for ‘parallel’
This flag introduces a revamped start page in Chrome providing a more organized and visually appealing way to access your most visited websites bookmarks and recent search history. To enable it, go to chrome://flags and search for ‘start surface’
By enabling this flag Chrome can automatically convert web pages to dark mode providing a more comfortable browsing experience in low-light conditions and reducing eye strain. To enable it, go to chrome://flags and search for ‘dark mode’
Enabling this flag enhances the scrolling experience in Chrome making it smoother and more fluid. It can be particularly beneficial on devices with high refresh rate displays. To enable it, go to chrome://flags and search ‘smooth scrolling’
Chrome flags provide Android users with the ability to tailor their browsing experience and unlock exciting features. By enabling these flags you can enhance productivity privacy and overall browsing enjoyment.
My last article was a comparison of Tiny 11 and Windows 11 operating systems a d today we’re going to look at how you can install tiny 11 on your computer. Tiny 11 is a lightweight and efficient operating system designed for low-spec hardware making it ideal for older computers or devices with limited resources. In this blog post we will provide a step-by-step guide on how to install Tiny 11 using bootable media. Follow along to unleash the full potential of your hardware with this lightweight operating system.
Before we jump into the installation process make sure you have the following:
1. A USB flash drive (at least 4GB) or a blank DVD.
2. An ISO file of Tiny 11 downloaded from the official website.
3. A computer or device on which you want to install Tiny 11.
To install Tiny 11 you’ll need to create a bootable USB or DVD. Here’s how:
Once you have your bootable media ready you’ll need to configure your computer’s BIOS or Boot Menu to prioritize booting from the USB or DVD. Here’s how:
Note: If you’re using a Boot Menu instead of BIOS simply press the key for accessing the Boot Menu (usually F12 or Esc) during startup and select the USB or DVD drive as the boot device.
With your system set up to boot from the USB or DVD drive you’re ready to proceed with the installation process.
Congratulations! You have successfully installed Tiny 11 on your computer. You can now enjoy a sleek and lightweight operating system with a minimal resource footprint.